To change ignition/charging system is a big thing when you go performance on a Zündapp.
The use of analog system with points ain't so appealing when cool performance parts are added.
Maybe not so necessary but it feels good to upgrade. Psychology is a huge part of tuning.
One thing when doing this is the possibility to have a advanced programmable ignition and just a rotor instead of a flywheel.
Those extreme systems have pros and cons depending on the needs.
Programmable ignition, low rotating mass but often no charging like the PVL system, these system are mainly for race use.
For street application there are many alternative as well.
Lower rotating mass with a really peppy throttle a nice sounding feature but with the downside of really poor driveability outside a track.
Hard to start and very low torque.
So here some consideration must be made.
Back in the day when I built my 5 speed engine I went for a Chinese copy of the Bosch CDI system.
Haven't missed a beat over the years but its a 6V system and now I wanted a 12V system instead.
So I bought the now very popular Kokusan system with 12V output.
With so many systems I put some flywheels on my scale to get some facts.
353g - PVL (No charging)
744g - Kokusan (6V or 12V)
832g - OEM Bosch (3 speed)
943g - China copy on Bosch CDI
360g - HPI with charging
(350g and 280g extra flywheel weights are available -> 710g/640g)
So for me it have two upsides with the change to Kokusan, 12V and a bit more peppy throttle with just under 200g less rotating mass.
Bombus Speedshop

Wrenchin' without supervision since the seventies...
Tuesday, January 17, 2017
Thursday, December 15, 2016
Rearset
A must have on a cafe racer is of course rearsets.
My choice is the Swedish classic from Raask.

Raask parts was mandatory on Swedish cafe builds in the seventies.
They made Rear sets, Clip-ons and headlight brackets back then and still do.
I bought all three but the headlight brackets was a bit worse quality then expected.
The rear sets and Clip-ons are not top quality either but the cult value compensate for that.
I mounted them in the swingarm OEM passenger peg holes.
Just drilled out the M10 threads and put a M10 from the inside and in to the peg.
Next up was the rods.
Used a bit of rebar I had laying in the shop since the bagger build.
Cut the piece in half, drilled and made M6 threads in all four ends in my lathe.
On the gear side I used both OEM ball joints from the Raask kit.
Brake side needed both more thinking and more work.
Ball joint in one end and a piece M6 threaded rod in the other.
The threaded rod is to make the rear bit a direct bolt on to the OEM Zündapp brake arm.


My choice is the Swedish classic from Raask.
Raask parts was mandatory on Swedish cafe builds in the seventies.
They made Rear sets, Clip-ons and headlight brackets back then and still do.
I bought all three but the headlight brackets was a bit worse quality then expected.
The rear sets and Clip-ons are not top quality either but the cult value compensate for that.
I mounted them in the swingarm OEM passenger peg holes.
Just drilled out the M10 threads and put a M10 from the inside and in to the peg.
Next up was the rods.
Used a bit of rebar I had laying in the shop since the bagger build.
Cut the piece in half, drilled and made M6 threads in all four ends in my lathe.
On the gear side I used both OEM ball joints from the Raask kit.
Brake side needed both more thinking and more work.
Ball joint in one end and a piece M6 threaded rod in the other.
The threaded rod is to make the rear bit a direct bolt on to the OEM Zündapp brake arm.

Both rods ready for test fit.

Gear side

Brake side
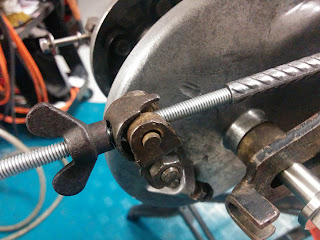

Detail of the rear brake rod with the old unrestored hardware
Tuesday, December 13, 2016
Recreation activities abroad
Life ain't just speedshop time for Bombus.
Some inspiration and other types of fun than fabrication is a must now and then.
Fairs are the single most fun and inspirational to do for a laugh seeking gearhead like me.
This time the trip went to Germany for the Custombike Show in Bad Salzuflen.
"The worlds largest exhibition for modified motorcycles" and big it was.
Not only that, we also got to catch up with two great friends, NPJ Design and iammrpartridge.So awesome to see these great guys again.
NPJ Design we didn't just met we also hang out in his awesome booth and the super cool Kriedler bikes. The want is strong these bikes!
Some random pics from the weekend.

There was a live "biker build off" at the fair, Germany vs France.
No shocker that the German bike won.
But this is the awesome French bike by EMD

Billet parts for the EMD bike waiting for assembly

And I put my mark on the EMD build

Our hotel the Kurpark-Hotel

A BIG guy

Amazing café bikes from Mellow motorcycles

Environmental friendly build

Cool Ironhead café build

The official Custombike party

Harley custom


More or less dressed chicks all over the fair

There was no shortage of extreme Harley builds

A cool build in the LOUIS booth

We had the best weather

A supercustom and probably superexpensive open belt trans for Sportster from NHPower

NPJ Design´s AWESOME booth with the supercool Kriedler bikes.

NPJ Design´s new build. Cant wait to see how cool this gonna turn out.
Monday, December 12, 2016
Headcups
An update of the headcups was necessary.
Made them really quick about fifteen years ago when I built the Zündapp.
Borrowed a friend's lathe at his work one night.
Back then I sucked even more than today when it came to using a lathe.
But function wise they turned out really good and have served it's purpose well over the years.
This winter with the whole rebuild they needed some TLC as well.

The old version

The updated and smooth version

Welded back with a little wider stop so the triple tree don't hit the tank anymore.
I also removed the steering lock because it doesn't fill any purpose anymore with the KS125 forks.
Sunday, December 11, 2016
Getting jiggy with it
Delay in da shop.
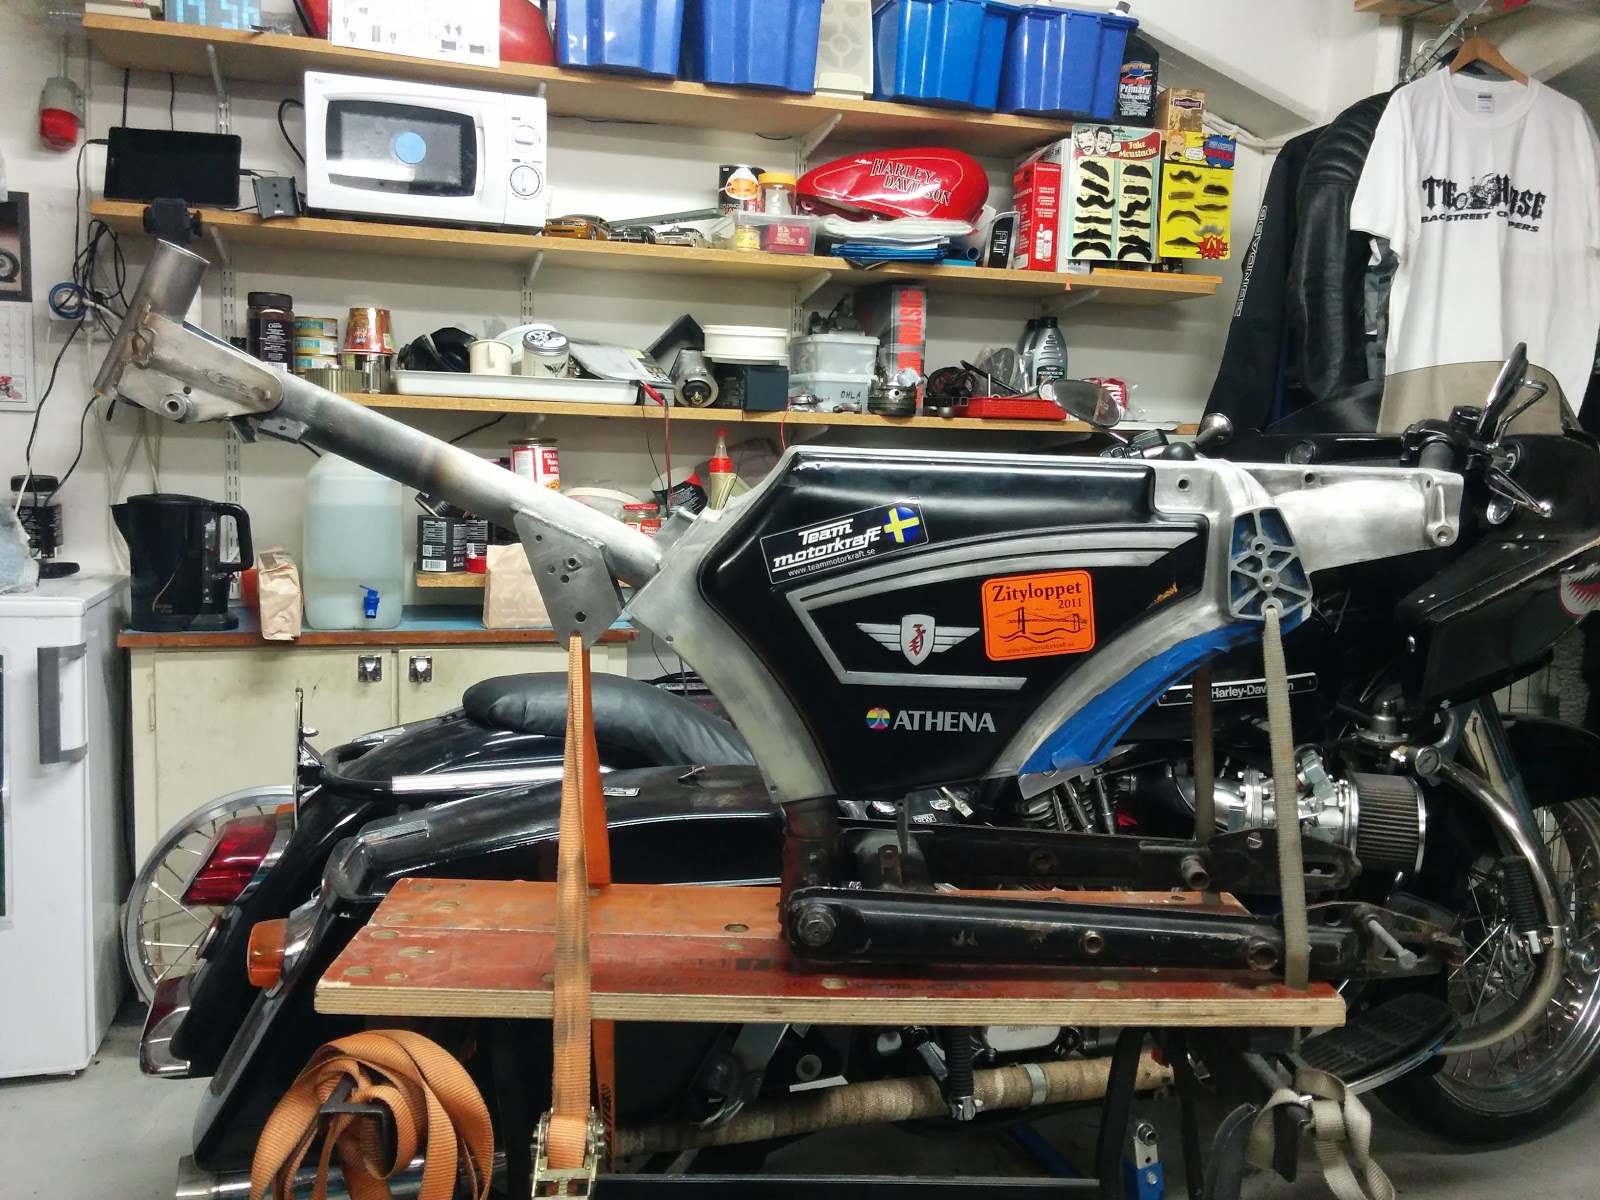
Needed a jig for the Zündapp build.
Some brainstorming and once again my trusty +20 year old Black & Decker workbench came useful. A piece of metal in bottom of the frame fixated in the bench wise and two straps was the solution.
Now It's in a better height and the workbench and wise is free to use for fabrication again.
Moving around is also possible now unlike when I had it in the workbench wise.
Monday, November 21, 2016
PartZ
First batch with Zündapp goodies except for the already arrived spokes.
This time just quite boring replacement parts.
So to spice up things I took the expensive choice and went for the stainless steel alternative.
Axles and chain tensioners are in this premium choice.
The rest are hollow axle, swing bushings and rubber for the elastic sprocket mount.
I also went for the red NGK spark plug cap/wire.
Also planning to upgrade the ignition/charging system from 6 to 12V and besides that a red "Racing Cable" maybe makes things a little more spicy?

Sunday, November 20, 2016

Subscribe to:
Posts (Atom)