Bombus Speedshop

Wrenchin' without supervision since the seventies...
Tuesday, October 29, 2013
The fourth winter (10/11)
The fourth winter was supposed to be a middle year with just some minor tweaks but it didn’t last very long so the first spring run was made in the middle of the summer.
This year these things got my attention
# New carb
# Carb tuning
# Windshield
Luggage rack
The luggage rack had been a horrific part on the bike since day one.
The only problem was that it has to be there if I want to mount the Tour pack.
But after a whole summer without the Tour pack mounted a single time I took the decision to remove the luggage rack for good.
The Tour pack was an awesome way to get the stuff dry and easy to a party but the bike looked awful.
And when the looks of the bike gets better and better for each year the Tour pack and luggage rack had to go.
A drybag will be my packing choice for the future or at least until I figure out a more good looking way to mount the Tour pack.

Some seconds later with the grinder ...

...and the looks went for the better
Shocks
Even I struck gold sometimes it seems.
Had been looking for Öhlins rear shocks since I bought the bike.
I realized that new Öhlins shocks was out of the question, the price tag was way out of my league.
So old cheap ones that I could rebuild to my specs was my target.
But suddenly one day when I did my daily bargain hunt on the net for parts I struck gold.
A pair of Öhlins from a FXR appeared on the screen and with an awesome price.
A quick call and I have got me a set of my dream shocks.
The FXR has basicly the same frame as the FLT, so the mounting was Childs play.
A quick cleanup was the only thing I had to do before I could mount them with the old hardware.

Swedish performance for American iron
Seat
The year before I bought a used seat from England at eBay.
The idea was to take off the "leather" and reshape the foam to something that looked something like a Harley "badlander" seat. I have done this on my previous Harley FXR with very good result,
but this time I had to put in more time, effort and $$ to get some result. The plastic seat pan was way too wide to fit so I had to do a pan in fiberglass from scratch anyway.
The plastic seat pan was cut and redone so it could work as a mould, then I covered it with fiberglass and epoxy.
This pan was then reshaped together with the foam and then re covered with some good looking "leather look" black vinyl.
The result became decent but not perfect, but it was good enough for a while.
Next time I will do a pure custom seat pan with the frame, tank and rear fender as a mould.

The ugly stock seat with driving position way forward to suit my length and taste

New seatpan in the making
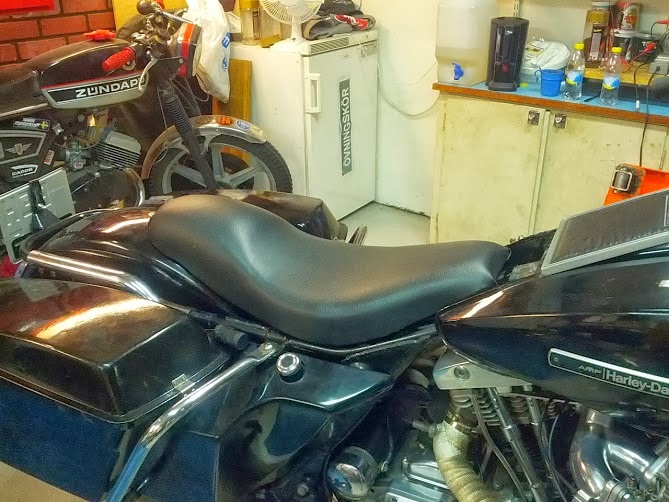
The new version, not perfect but good for now.
Handlebar controls
The old ugly and totally worn out controls was replaced by a used set of Harley V-Rod controls.
Clutch side with hydraulic clutch master cylinder to match the Hurst hydraulic clutch cover.
All of it was repainted in satin black powder coating and new gaskets.
And when it all came together it both looked and worked great.

The totally worn out OEM handlebar controls

The new ones, paired to the ISR 6 pot caliper and Hurst hydraulic clutch cover
Clutch
A need for some serious clutch action was another thing high up on the to do list.
Over the years the cluch wire assenbly hade been worn out.
It was so bad that I had to shut of the engine to get it in neutral when standing still.
I first tried the classic choppertrick to remove one clutch disk and one steel plate.
This did't solve the problem with neutral it just gave a slippery clutch.
So I realized something had to be done so I went hydraulic.
A new sturdy billet trap door for a newer 5 speed gearbox was mounted before a HURST hydraulic clutch cover could go on.

The stock worn out and not so pretty clutch release

The new shiny Hurst hydraulic cluth release
paired with the new billet trapdoor behind
Front wheel
Then it was time for my stock 16" cast front wheel to be replaced by a single disc chrome hub from a newer Harley.
Around this I put shiny chrome spokes and finally a 21" x 3,5" Akront/Morad alu rim.
On the left side I mounted an ISR six pot race caliper and a custom made full floating racing 330mm ISR disc.
The ISR caliper I mounted in the existing left leg bracket with a custom billet aluminum adapter plate i made.
Right leg original caliper bracket was shaved of.
And after that both legs got a bright polish before new seals was mounted.
Finally a new nice black Continental ContiRace Attack Custom 120/70- 21 tire was mounted before it all came together.

First cut is the deepest...

Early mockup to see the difference
(Note the not so rigid cardboard brakedisc)

First I made an adjustable caliper bracket template

Than I made a full scale bracket out of 10mm alu...

...and with that bracket as template I made the final bracket
out of a piece of 10mm alu I got from ISR

The shiny alu Morad 21" x 3,5" rim

The awesome threaded Continental ContiRace Attack Custom

And this is how it's turned out. Not so bad I think
Subscribe to:
Posts (Atom)