Bombus Speedshop

Bombus Speedshop
Wrenchin' without supervision since the seventies...

Thursday, March 24, 2016

Rear fender

Hard to do temporary stuff when it still have to look reasonable and have a good function. 
The rear fender is one of those things right now, 
I don't trust it much to rescue me from the hard and unfair amounts of rain that often decorates the roads here in Sweden. 
So for now I went for the tiny fender I had. 
First some bondo and sanding to make it at least OK before I showered some layers with black paint over it. 
Next step was new to me, vinyl wrapping. 
I bought a "sticker bomb" vinyl sheet at eBay for this purpose. 
Slow and with determination I started with the task.
WOW, what a shitty vinyl wrap that was. 
I'm no stranger to crappy Chinese stuff from eBay, but this was really another level of crap. 
I went for it anyway and after a while I had a sticker bomb fender that actually looks OK.
Or as a wise man stated: "Good looking from far, but far from good looking"
Caught by the moment I continued with the air cleaner insert, and that turned out really god as well.
The black fender and the stickerbomb vinyl sheet when
I still was happily unaware of the nightmare to come

Wrapping in full swing

And the result. From a distance it actually looks really good.
Most of the fender will be covered by the seat anyway.

Tuesday, March 22, 2016

Oiltank

So after much consideration I very carefully asked my ol' lady if I could borrow her "garage" and tools just a sec.
I probably made a good impression over the last 27 years because I got her blessing and so the work could begin.
*hehe*
First filled the oiltank with water and then poured the water in a larger bowl that I could place on the scale. The verdict was just a hair under 3 liters.
But in reality it probably will be more close to 2,5 liters/0,6 gallons.

Tools of the trade together with the oiltank ready for measurement.


The final verdict, just under 3 liters.

Wednesday, March 16, 2016

Big day....

Big thing 1: Today was a BIG day in the shop ! Frame painted and engine in for real. Now the build takes a sharp turn for the better.
Big thing 2: Same day I also got the official papers in the mail.
My build now exist even in the real world outside the Speedshop and the official name for this vehicle is Bombus Speedster.

The 2003 1200cc powerplant in its new home, in the 2016 Bombus Speedster.

Tuesday, March 15, 2016

Bracket adjustments

Before painting the frame I had to adjust some things on the side bag brackets.
The rear one needed a notch to make the chain adjuster go free.
And the front one blocking the battery entry from the left.
The battery have to come out on the left, the right side have the chain that blocks.
So I had to split the front bracket for this reason.

A notch in the rear one to clear the chain adjuster. 

The rear needed a split. 

And bolted together again. 


Saturday, March 12, 2016

VIN number

A thing I have dreaded for a while now, punching the VIN number.
Now it was for real, no errors allowed.
Target for this was left side of the rear motor mount.
The motor mount plate is 10mm thick and my punches are made of 8x8 mm square bits with 6 mm symbols.
Made lot of thoughts how to do it and I came up with a idea.
I made "walls" out of 1 mm sheet metal, folded it double on one side and then clamped them on the motormount.
By doing this I got a 8 mm ditch where I could squeeze down the punches and this gave me great support sideways.
The job took a while and required lots of adrenaline and sweat but it turned out great in the end.

My 6 mm punches I used and the supports I made of 1 mm sheetmetal folded double on one side.
The target area, left side of the rear motormount.

The supported clamped down and first symbol ready for some beating.


Saturday, March 5, 2016

Fossil fuel exit

I traded a beat up Sportster tank for a exhaust from a friend.
He have used it on his bike for many years so it can't be to bad.
It looked quite good but it needed a little more angle where the pipe meets the damper.
I also shortened it about 50mm/2"and then it looked fine.
Next step was exhaust wrap.
After fighting both finger cramp and sanity it turned out really well.
This will be a nice exhaust until I making the transition to turbo in a year or so...

Where I shortened the pipe and made a small angle to get it lining up better. 

First wrapping the short bit for the rear head and then the loong bit was next. 

And this is how it turned out, not to bad

Chainguard

Here in Sweden a motorcycle must have a chainguard to be legal, but the construction is free.
It just have to protect if the chain brakes and gets loose, it doesn't even have to cover the chain.
So after talking with the tech inspector my choice fell on just a sturdy pin.
A really sturdy and rigid pin that breaks the chains path if broken is enough.
"It's up to you if you like to be dirty" was the tech inspector's verdict.
*Hehe*
So I took a 10mm steel pin drilled a hole in the fenderstrut and welded in the pin, and suddenly I had a chain guard.

The hole and the pin

The two joined with some welding. 

I might cut it off just a tiny bit, time will tell. 

Wednesday, March 2, 2016

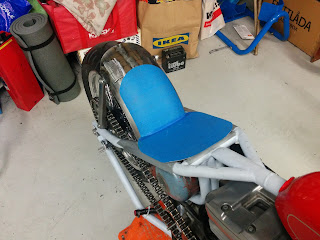
Seat, part one

So before final teardown I have some things to first, one of those is the seat.
Need the actual bike to make it fit, at least the first part with the seat pan.
I first considered making it out of fiberglass like I did on my bagger but it became steel in the end.
Mainly because I had a steel fender wich fitted over the existing fender and could act great as the rear part of the pan.

First cut a bit of the fender to get one half of the pan.


Measure and cutting the other half of the pan.


Testfit of the two pieces


Narrowing the rear part and then weld the two pieces together. 


And the final shaping. 
I covered it with masking tape to  see the shape better. 


Next step, frame mounts...and foam...and shaping.....and....